ADVERTISEMENT
For the Strawberry Topping:
- 1 1/2 cups fresh strawberries, hulled and sliced
- 1/4 cup granulated sugar
- 1 tablespoon lemon juice
- 1/4 teaspoon vanilla extract (optional)
Kitchen Equipment Needed
- Muffin tin or cupcake pan
- Muffin liners
- Mixing bowls
- Hand mixer or stand mixer
- Small saucepan (for the strawberry topping)
- Spoon or spatula for mixing
- Measuring cups and spoons
- Cheesecake server or spatula for serving
How to Make Mini Strawberry Cheesecakes
Making Mini Strawberry Cheesecakes is simpler than you might think. Follow these easy steps for a decadent, crowd-pleasing treat.
Step 1: Prepare the Crust
- Preheat your oven to 325°F (163°C).
- In a medium-sized bowl, combine the graham cracker crumbs, sugar, and cinnamon (if using).
- Add the melted butter to the mixture and stir until it’s evenly coated. The mixture should resemble wet sand.
- Line a muffin tin with cupcake liners, and spoon about 1-2 tablespoons of the crust mixture into each cup.
- Press the crust down firmly using the back of a spoon or your fingers to create an even layer.
- Bake the crusts for about 5-7 minutes, or until they’re lightly golden brown. Remove them from the oven and set aside to cool while you prepare the cheesecake filling.
Step 2: Make the Cheesecake Filling
- In a large mixing bowl, beat the softened cream cheese with a hand mixer or stand mixer until smooth and creamy, about 2-3 minutes.
- Add the sugar and beat again until the mixture is light and fluffy.
- Add the eggs one at a time, beating well after each addition.
- Stir in the vanilla extract, sour cream, and heavy cream until fully combined.
- Spoon the cheesecake filling onto the cooled crusts, filling each cup almost to the top.
- Smooth the tops of the cheesecakes with a spatula or the back of a spoon to create an even layer.
Step 3: Bake the Mini Cheesecakes
- Bake the cheesecakes in the preheated oven for 18-20 minutes, or until the tops are set and the edges are lightly golden. The centers may still jiggle slightly, but they will firm up as they cool.
- Remove the cheesecakes from the oven and allow them to cool at room temperature for about 10 minutes.
- Once cooled, transfer the mini cheesecakes to the refrigerator and chill for at least 3 hours, or overnight for the best results.
Step 4: Make the Strawberry Topping
- While the cheesecakes are chilling, prepare the strawberry topping. In a small saucepan, combine the sliced strawberries, sugar, lemon juice, and vanilla extract (if using).
- Cook the mixture over medium heat for about 5-7 minutes, stirring occasionally, until the strawberries release their juices and the syrup thickens slightly.
- Remove the pan from the heat and let the topping cool completely.
Step 5: Assemble and Serve
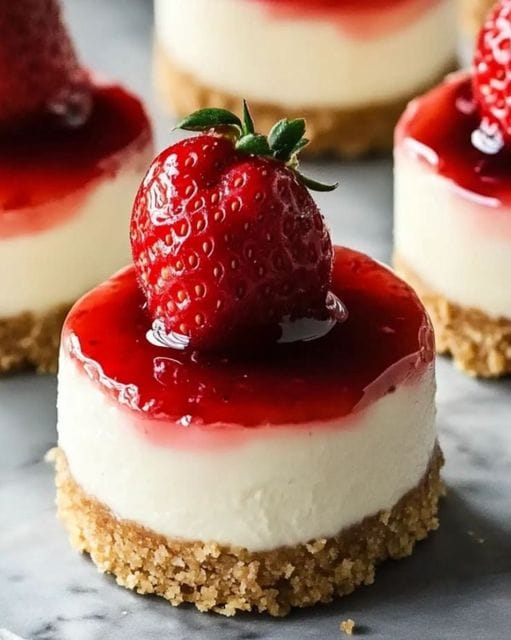
- Once the cheesecakes have chilled and the strawberry topping has cooled, spoon the strawberry mixture on top of each cheesecake.
- Serve immediately, or keep the cheesecakes chilled until you’re ready to enjoy them.
Tips for the Best Mini Strawberry Cheesecakes
- Softened Cream Cheese: Be sure to soften the cream cheese before mixing it, as this will help prevent lumps and ensure a smooth, creamy filling.
- Chill Before Serving: Allow the mini cheesecakes to chill in the refrigerator for at least 3 hours to help them set properly. For the best texture, chill them overnight.
- Strawberry Topping Variations: If you want to switch things up, you can make the topping with other berries like blueberries, raspberries, or blackberries. You can even mix a combination of berries for a colorful and flavorful topping.
- Mini Cheesecake Pans: If you have a mini cheesecake pan with removable bottoms, use it to make it easier to remove the cheesecakes once they’re set.
- Make Ahead: These mini cheesecakes can be made ahead of time and stored in the fridge for up to 3 days. Just add the strawberry topping before serving to keep them fresh.
ADVERTISEMENT
